Christmas Cards 2013 #6

Hi! I’m finally back! So sorry for MIA-ing the whole of November. It was the exams period and I was trying to keep away from all forms of distraction. Anyways, I’m back now and I’ve got some more Christmas cards to share! I got these cards idea from made by hand. When I first saw it, I felt that the card was really nice cause of the simplicity and so, I attempted it!

                IMG_9921     IMG_9922

The circles were cut out from papers that I’ve collected over the years and I used something circular available as a stencil to ensure a full circle. Before pasting the circles on, I did some bordering as it seemed pretty plain without. The main challenge for this card was how to place the circles. There was a lot of trial and error, considering how to overlap and place them to create the desired effect. I finally decided on the 2 above! ((: The letters on both cards are the same, they are from Petaloo Dazzlers series in blue.

The cards could be considered one of the more economical cards that I’ve made. The materials are just paper and some letter stickers with colored/glittered pen for the borders. You can definitely do without the studs, depending on your taste and preferences. 

So yeah! Hope you got some inspiration from this post! ((:

Christmas Cards 2013 #5

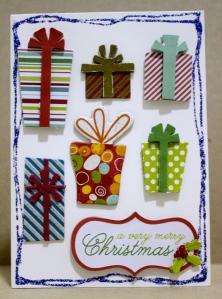
The cards that I am going to share today is actually designed by my sister, and I really liked how it turned out! ((: So here it is!

IMG_9933

When she saw the present embellishments on my table, she was like ‘oh, it would be nice to have a card filled with presents’. And so here are the presents! The presents are mostly from Ruby, Rock-it and { my mind’s eye }. The sentiment was also from the same Winter Wonderland set from { my mind’s eye }. I decided to add the blue glitter borders so that the card would have a more complete finish.

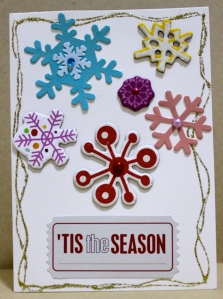
And cause I loved how the card turned out and we don’t have snow in Singapore…

IMG_9931

I came up with this! The snowflakes are from Studio Calico and some cupboard chip set that I’ve had since a few years back. For some of the flakes, I added some pearl embellishment on them to give more shine to the card on a whole. The sentiment is from Art Warehouse. And for this card, I added a gold border.

So these are the cards I have to share for this post! Hope you like them!

Christmas Cards 2013 #4

I’m back with another 2 christmas cards to share! I’m sharing them at the same time as they are similar and I used the same silver background. HEE!

IMG_9932

I used the silver chevron paper I got from Amy Tangerine and you’ll see bits and pieces of it around my other cards too. I really love how versatile it is and how it suits my needs for my christmas cards. So anyways, I kept this card pretty simple. The snowman is from { my mind’s eye } Winter Wonderland series. The word ‘magic’ is from Studio Calico and ‘season’ is from an alphabet sticker I’ve had for awhile in my collection.

IMG_9941

For this other card, I used the snowman tag from something I got a few years back, so I can’t seem to find it online anymore. And I pasted the alphabet stickers on top for the sentiment.

These cards are fairly easy to do. I hope you all like it and would find some inspiration! ((:

Christmas Cards 2013 #3

For the card(s) that I have to share today, I actually saw the design from somewhere awhile back. I think it’s from Anthropologie or Rifle Paper Co, but I can’t seem to find it on their website anymore. Anyways, when I saw the design I really liked it, but as I have terrible handwriting, I have been procrastinating about making it into a card on my own. But I’ve finally found the courage and here they are.

First Attempt

First Attempt

So I basically wrote out the words roughly with a pencil, then go over it with a black fine point Sharpie pen. But I realised that the lines don’t seem to flow nicely cause they weren’t drawn over too well. And so, I decided to go over it with the gold glitter glue. It made it look much better and I really liked the effect, though it’s still no where near perfect.

And in my attempt to perfect it…

Second Attempt

Second Attempt

I wasn’t too pleased with the spacing of my lines at the end. So…

IMG_9884

Third Attempt

And then I thought… This is actually my lowest cost card and since I like the design so much…

IMG_9955

Fourth Attempt

HAHA! This one I had the most difficulty with, the spacing gave me a headache and I re-sketched quite a number of times. But as you can see, it is still no where perfect. But anyways, I still like it a lot.

So I hope you all like this design as much as I do and try it out sometime! ((:

Christmas Cards 2013 #2

Hi! Today, I’m back with another Christmas card! ((:

IMG_9943

This card is pretty straight forward. I used buttons from the collection I have, to create the shape of a triangle to be the ‘tree’. The star right on top is from Petaloo and I used some twine to form the trunk. I think the difficult part about this card was to fit the buttons properly and arrange them into the ideal shape, but it was great fun to do it and there was a sense of accomplishment once it’s pasted nicely!

So, this is the card I’ve got to share today! Hope you liked it!

Christmas Cards 2013 #1

So as mentioned in my previous post, I’ve started making Christmas cards!! And now I’ll share with all of you the cards that I’ve made. Some of them are re-creations, while others are from my own imaginations. My initial plan for this year’s cards was to use the colors blue, silver and gold only. However, I realised that most of the Christmas material were in red and green. I tried my best, but you’ll see that I wasn’t able to stick to the plan. HAHA! Anyways, hope you all will like them and find some inspiration!

FIrst up!

IMG_9945

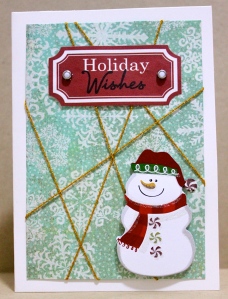
I got my card stocks from Grant Studios, they’re priced at S$19.90 at PaperMarket and came in a box of 50. I used shimmery blue thread in the color ‘Twilight’ from We R Memory Keepers and went round the light blue snow flaked paper I chose. Something that you might want to note, while bringing the thread round the paper, it is important to scotch tape them near the edge of the paper at the back. If not, the thread will become loose and the shape won’t stay. The snowman is from Petaloo and the sentiment is from Creative Imaginations.

I really liked the design, and so I made another one!

IMG_9923

The golden thread here is in the color ‘Goldilocks’ and I added the 2 small studs on the sentiment to make it look better (hopefully). HAHA.

So this is what I have to share with you all for the first Christmas Cards post! Hope you have enjoyed what I’ve got to share today! ((: